As much as I love providing process art activities for preschool and kindergarten children, at times, I also want them to produce semi-recognizable pictures to illustrate class books, math, and science recording sheets, and occasionally for topic based bulletin board displays.
This can be a challenge with young children who rarely think about their finished products and are, without a question, at the age where they are learning about art with experimentation and discovery.
In their relaxed and focused exploration, children’s finished work can quickly look like a mass of scribbles and barely resemble the topic on hand.
The following preschool and kindergarten drawing tips provide opportunities for children to experiment with different ways of creating lines and expressing themselves artistically, while at the same time producing original, finished drawings that are not scribbled over.
Drawing with a marker, coloring with a limited palette of crayons
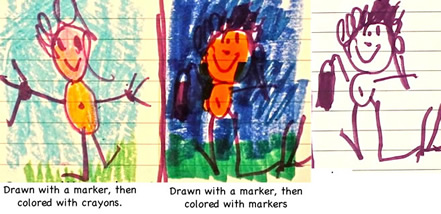
In the pictures below, the image on the left was drawn with markers, then filled in with crayon. The center image was drawn and colored with markers. The picture on the right is the original drawing.
Although the bright orange marker showed up in the middle picture, much of the details of the arms, legs, and bag are hard to see.
To capture the details of student’s original drawings, have them follow the steps below.

Step #1 Organize materials ahead of time
- Set up specially marked tubs of markers and crayons for this type of drawing.
- If the materials are organized ahead of time, each step below is much easier.
Step #2 Children draw only with markers
- Limit the marker colors by removing most colors and leave only the darker colors such as black, blue and purple to draw with.
- Give one marker to each child.
- Remove markers as children finish their drawings.
Step #3 Children color only with crayons
- Set out crayons.
- Limit the crayon color choices by removing the dark colors, leaving only the yellows, pinks, reds, oranges, bright and light greens, blues and light purples.
Step #4 Remove pictures
- Tactfully remove the picture from the child at a “finished” point.
- Provide children with more paper if they want to keep drawing and coloring.
- Have a supply of extra papers on hand.
- Most children I have worked with are happy to give you their picture and are eager to draw you a second one if you ask them.
Preserve drawing details with this method

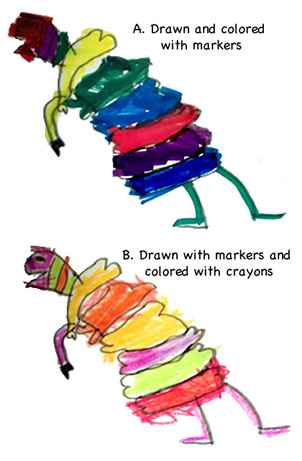
I managed to photocopy this 5-year old’s dinosaur drawing before she colored it. Then I gave it and the photocopy back to her to color. In the top image, she colored with markers. In the bottom image, she colored with crayons that had the dark colors removed.
In the top image, the markers covered up the details on the face and some of the section detail of the dinosaur but all those details are visible in the bottom image. Give it a try.
See a sample
This type of drawing and coloring works well for group work, murals, theme images and class books.
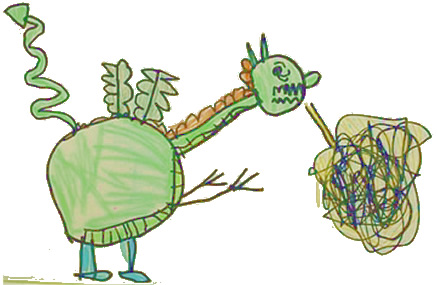
Check out a whole class book, “How to Trick a Dragon”, illustrated with this method…
