Late September is a great time to study apples with an apple theme or investigation.
Many varieties of apples are ripe, there are orchards to visit and opportunities to compare, sort, and measure the fruit.
Rather than give children worksheets about apples, provide them with opportunities to sort, classify, and taste apples and let them experiment with apple machines.
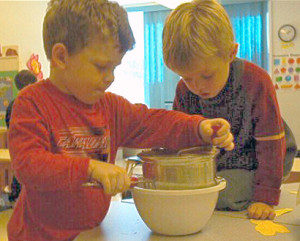
The apple corer and food mill (see below) for making applesauce were always popular in my classroom. Children are fascinated by machines, especially ones with handles that they can turn.
Playing with apple machines
Apple corer and peeler
- Borrow or purchase an apple corer and peeler machine
- Let each child core their own apple (wash it first!)
- Bake apple tarts OR
- Make applesauce leaving skin on and core in (check for bugs)
Fruit and Vegetable Mill


- Borrow or purchase a food mill like the one in the picture.
- The children take turns grinding the cooked and cooled apple pulp. They love turning the handle and watching the cores, seeds, and skin remain inside, and the creamy sauce drip out the bottom.
Juicer
Borrow a juicer, such as this one, and make apple juice.
Class book on apple machines
- Children talk about how the machines helped them prepare food.
- Record some of their comments in a class book, have children illustrate pages
Apple Books
Many apple picture books are available and apple poems and rhymes are abundant online. Poems and stories are a great starting point for apple science and math.
Read this post for an apple math and literature activity based on the book, “Ten Apples Up on Top”.
Observe the characteristics of an apple
- Look for the star in the apple (cut horizontally)
- Cut both ways to see the seeds inside.
- Visit an apple orchard
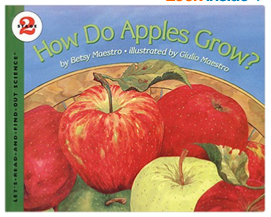
- Read “How do Apples Grow”
- Cut and glue, how does an “Apple Grow Worksheet”
- Create an apple tree throughout the season’s book (see below)
Make an “Apple Tree Through the Seasons” book
Materials:
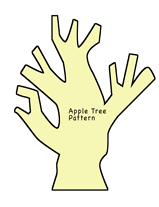
- Teacher cuts tree trunk shapes for tracers out of the lightweight card. (free pattern here…)
- Photocopied sheets of 8.5 x 11″ .. Use this link “The apple tree in _______”
- Tape
- Dark brown jumbo crayon with paper taken off
- Pencils
Procedure:
- Small groups of children work at the tables while the others are in centers.
- Each child puts one cut out tree trunk under a piece of white paper with the words photocopied on it (see materials).
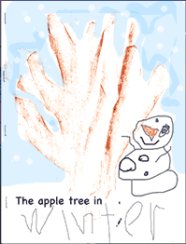
- Tape the edges of the paper to the table. The children rub over the paper with a dark brown jumbo crayon on its side and the edges of the cardboard trunk underneath will appear.
- Have the students make 4 papers each, one for each season. Some will need help to finish four images.
- Help students print their names on all four sheets.
- Don’t worry about removing the tape from the corners of the paper, just peel it off the table and fold it over the papers.
- Decorate one page for each season, over a week’s time, discussing the seasonal changes. Read a book such as, “The Season’s of Arnold’s Apple Tree”.
- Children fill in the season on each page, if able.
Spring: Glue bits of pink tissue on the spring tree, press small pieces into a spot of glue with the eraser end of a pencil.
Summer: Draw or glue small green apples on the summer page.
Autumn: Use a red bingo dabber to make red apples on the autumn page
Winter: Bare branches and snowmen work well in winter. A blue sky with dabs of white paint helps finish the picture.
Shopping for apple machines from Canada?
Go to Amazon.ca to find the items above.
![]()


