A key thing to remember when teaching elementary art education to young children is that they are more interested in investigating materials and techniques than creating a great final product.
As children create their own art they begin to compare colors and textures and slowly develop an ability to choose specific materials to achieve the results they want.
They move towards organizing design, they experience sensory exploration of different materials, and they develop self-expression and inventiveness. They experiment with space, shape, and size, learn social skills, and learn responsibility as they clean up and put materials away.
Try the 5 tips below to help your students feel like successful artists and to have bright colorful artwork to post on your bulletin boards.
1. Teach mini elementary art education lessons throughout the day:
- Point out the elements of art when reading picture books.
- Show how the artists use colors, shapes, and textures as well as how they use the pattern in images.
- Read the story through a couple of times during the week, then use the style of the artist for an art lesson
- Display a different famous artist poster every two weeks.
- During snack times direct the students’ attention to the art and talk about the artist and the painting.
2. Teach elementary art education with centers…
- For students with very short interest levels for art activities, set up elementary art lessons with centers.
- Rotate the students so six or seven at a time are at the art table.
- Have other art centers, such as a modeling clay table (plasticine or play dough) and an imagination station set up that require little or no supervision.
- Avoid giving the students identical worksheets and calling it art.
- Provide seasonal imagination stations.
- Do you avoid setting up an art center because of the mess? Try teaching these 8 basic elementary art education skills early in the year for less cleanup. Read more…
3. Always try each activity yourself
- Try each activity yourself before asking the children to complete them.
- If you are right handed, try completing the project with your left hand and vice-versa. It will give you a better idea of what the process is going to be like for a young child with less small muscle development.
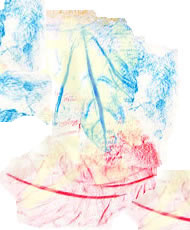
- Creating leaf rubbings, for instance, seems to be a fairly simple autumn art lesson but the process is difficult for young children.
- To make such projects easier, place the leaves vein side up on the table.
- Put a paper on top of the leaves and tape the paper to the table to keep it from moving around and ripping.
- Give the children big, chubby dark crayons with the paper torn off and encourage them to use the side of the crayon.
4. Limit materials to achieve the effects you want…
- Limit the materials and tools you give the children to create the art you’re trying to achieve.
- For instance, avoid giving the children black and brown paint if you want bright colorful artwork. If you want bold outlines on the pictures, give them big thick felt markers to draw with rather than thin ones.
- Take markers away after the drawing part of an activity is finished and provide bright Prang crayons
to fill in the rest. This prevents the student’s from scribbling over their previous work.

5. Demonstrate first
- Use correct vocabulary when demonstrating or helping children. Use terms such as pastel, dark, light, same, different and texture.
- Make some boo boo pictures to give the kids a heads up on what will probably go wrong as they experiment with the lesson. For example, use only yellow in a leaf rubbing and then put it up on the wall. Ask the class, can we see it? Why not… how could we make it show up more? Try another color and show again. Compare results.
- Stress that art is very much a, “I wonder what would happen if I….”, experience


