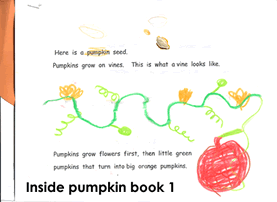
Use the following free Halloween worksheets (these are recording sheets) to create a math and science pumpkin book, to make a “parts of the pumpkin plant” science booklet, to practice counting and to review triangles.
Pumpkin Book 1 contains worksheets to record the science and math results from activities on the previous post.
Students record the growth of a pumpkin, the pumpkin’s circumference, their pumpkin observations and have a pumpkin muffin recipe to take home.
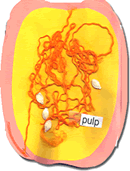
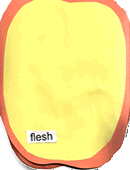
Pumpkin Book 2 teaches the parts of the pumpkin plant.
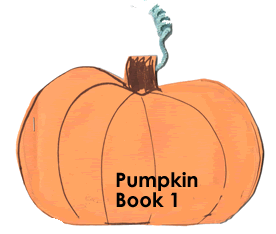
Pumpkin Book One
Materials:
- Orange construction paper
- Free Halloween worksheets – 5 recording sheets
- Dried pumpkin seeds
- Green pipe cleaner
1. Cut out a front and back pumpkin from orange construction paper. Draw your own or use this pumpkin tracer.
2. After students finish each pumpkin math or science activity from the previous page, Pumpkin page 1, have the students complete the corresponding pages on the recording sheets with drawings and copying the correct information from the chart or chalk.
3.When all the sheets are completed, have the students put them in order and staple them between the two cover pumpkins. Put one staple on the left-hand side of the booklet.
4. Fold all the pages in half, then in half again before closing the booklet. Open up pages to read the pages.
5. Wrap a green pipe cleaner around a pencil to create a vine and tape it onto the pumpkin book.
Pumpkin Book Two – Parts of the pumpkin plant
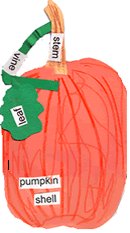
This is a follow up activity for after the students have completed the pumpkin observation activities on this page.
Materials for each child:
This makes a large book, cut paper size in half to make a smaller books and to save paper.
- 1 piece of orange 12 x 18 construction paper
- one 4 x 2 piece of brown paper for stem
- 1 inch strips of green paper for vine
- 4 x 3 inch green paper for leaf … tracer here
- 2 pieces of yellow photocopy paper
- one photocopied sheet of pumpkin plant words
- wrinkly orange yarn
- dried pumpkin seeds (saved from a prior activity)
Tip! – Depending on your students’ ability levels, you may have to cut out some of the pieces beforehand.
Procedure:
Students:
1. Fold orange paper lengthwise. Draw a large oval touching all sides of the paper.
2. Cut through the folded piece of orange construction paper to make two ovals as large as possible for pumpkin shells.
3. Cut out two ovals as large as possible from the two sheets of yellow photocopy paper.
4. Glue the yellow sheets on the two orange pumpkins. These are the inside of the pumpkins.
5. Cut out a stem shape and a leaf shape.
6. Draw lines down the outside shell of the pumpkin with orange markers.
7. Attach the stem, the vine and the leaf with tape or glue.
8. Help students glue the correct word labels from the free Halloween worksheets. Have students focus on the first letter of each word or have the children match the word written on the chalkboard to the one on their paper.
Example, “Look at your words. Find the ones that start with “s”. Look at the letter I made on the chalkboard, this is an “s”. There are 3 words that start with an “s”. They could say stem or seeds or shell. Help me out. We are looking for the word stem. What sound comes next in the word stem…sss tttt eee mmmm? That’s correct a “t”. A “t” looks like this. Find the word that looks like this..” Write “stem” on the chalkboard.
Glue all words on.
9. Put two staples on the left-hand side of the book.
10. Open book so the inside is showing. Have students put lots of white glue on the right inside page and then put wrinkly orange yarn for pulp and dried pumpkin seeds into the glue. Leave books open until dry (probably overnight).
