Create a kindergarten science center that will inspire you and your students. Scroll down to find ways to keep it easy to update and use it to prompt children to ask questions and to reinforce skills that they need to learn. Most importantly, make it child friendly. Its purpose is to display real objects for children to ask questions about, to touch and explore, and to prompt them to further research.
Include seasonal items such as leaves, seashells, bones, birds’ nests, feathers and plants or base the content on the topic / theme that you are investigating. Introduce tadpoles, pond water, and other living creatures and teach children how to care for them.
Create two science center zones: an observation zone and an experimental zone
The observation zone (sometimes called a discovery center or a provocation) is a place for children to practice the skills of:
- observation and inquiry
- making collections
- communicating their new knowledge
- testing their own ideas
The experimental zone is a place for children to:
- explore science equipment and materials
- learn about science phenomena as they play, try things, fail, and try again
If possible, place these two areas close to one another. Integrate kindergarten science skills and the topic you are presently introducing to the students into the centers.
Zone 1 – creating the science center observation area
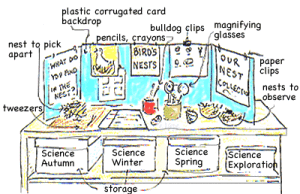
A shelf about 18 – 24 inches wide and 4 feet long and 23 – 26 inches high, placed in front of a window works well for a kindergarten science center observation zone as the light from the window encourages plant growth in the spring.
The center can easily be made with a tri-folded piece of bright-colored plastic corrugated card for a backdrop. Pictures and words can be clipped to the backdrop quickly using paper clips and/or bull-dog clips. The less complicated it is to change the kindergarten science center, the more often you will provide new and interesting things for the children.
Items to put on the table:
- aquarium or large restaurant sized glass jars for living creatures (keep away from direct sunlight)
- wire mesh lids for the above and a sheet of mat board with tiny breathing holes for creatures that might escape through the wire mesh (spiders!)
- science center booklets
- interesting items that go with your topics (birds’ nests, shells, rocks, bits of trees…)
- containers for pencils, crayons and erasers
- magnifying glasses, and bug bottles
- book making supplies – paper, stapler
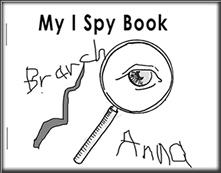
- open-ended booklets (see image)
- children also like to place things they bring to school on the table!
Label all containers with words and pictures of the items they are to hold to help the children put the items away correctly.
Recording sheets and blank booklets such as the, “I Spy Book” on the right, encourage children to draw their observations. Using furniture with a lower shelf (see image above) makes it easy to store materials and objects for other science displays and they can be stored seasonally.
Zone 2 – a place for children to experiment with science materials…
Another table or desk large enough for 2 – 4 chairs works well for the kindergarten science center experimental zone. Open containers labeled with both words and pictures of what they contain store the materials. Cookie sheets lined with felt, keep objects from rolling on to the floor as the children play with them.
To keep it simple:
- do not put too many things in the center at one time
- teach children how to correctly use the equipment and to put it away as you introduce it
- rotate materials regularly throughout the year
- whenever possible relate the materials to the science center observation area
- use fairly durable materials to withstand constant play and exploration
Science center materials for young children enable them to build, create and design, to actively explore, think and reason, to identify problems and to try possible solutions to problems.
Throughout the year add items such as:
- magnet sets
- light paddles
- old eye glasses
- strips of colored transparent and opaque plastic
- balance buckets
- balance toys
- tuning forks
- stethoscope
Helping students record their observations…
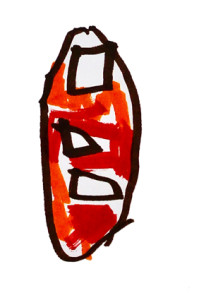
The child who drew the picture on the right first observed the colors of the Autumn leaf and looked at its shape. Then he measured the leaf with Unifix™ cubes. Finally he did a drawing of the leaf with the 3 cubes on top.
If you regularly model the skills of observation and recording for your students, their drawings will begin to increase in details.
Every time you’d like your students to record a new science center activity, model the process first before you put the new recording sheets or booklets in the science center.
Sample observation drawing lesson – observing and drawing a leaf
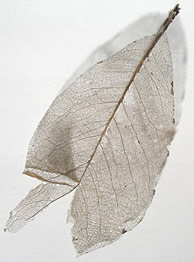
In this example the children had observed a variety of leaves in the science center. A child came in from recess with a leaf that had mostly rotted away, which led to an interesting questions and an opportunity to model a recording session. The child said he had found a leaf with no skin on it!
“When I look through the magnifying glass at the leaf Stephen found in the playground, I can see that most of it has rotted away. There are lots of lines on the leaf. We call these veins. I’ll draw the leaf really big on this chart so everyone can see.” Always draw what you are observing on a larger version of the children’s booklets so it is easy for all the students to see.
“First I’ll draw the biggest line or vein that I see in the middle of the leaf down the center of my page. Next I will draw the smaller lines that I notice are attached to the big vein. I can count the veins on each side. 1, 2, 3, …. There are 7 veins on one side and 7 on the other side.”
Give students an opportunity to ask questions, talk and add a few of their observations as you draw.
“Stephen told me he saw a thin brown covering over the edges of the leaf. He found the same color brown crayon and I’m going to color over some of the leaf with it.
I want to print the words, “Stephen’s leaf”, beside my picture because he found the leaf. I can copy Stephen’s name from the center time name tags. I remember that the word “leaf” is on the picture of the leaf in the science observation center so I will copy the word from there. Can you find that picture and then tell me what letters to print? ”
Let the children observe how you plan and think through the process of recording the information you have observed and how you find the words you need to print on the page. Repeat this process over with new science discoveries and the children will soon be imitating the observation and recording process.
