The imagery of winter inspires many Art and Language Arts winter activities. White snow, frosty patterns, cobalt blue shadows, and spots of color against white snow inspire many ideas for winter pictures, booklets, and investigations.
Winter art & literacy activities
Activities such as winter bird watching, building bird feeders, making snowmen or going for a snowy day walk, all capitalize on student curiosity and children’s desire to investigate the world around them, as well as prompt them to write, draw and create.
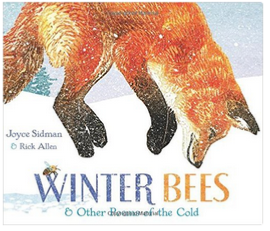
Winter poetry like The North Wind Doth Blow, Pease Porridge Hot, and Rain, Rain Go Away, encourage language arts movement and drama activities. Winter Bees has beautiful lino print illustrations by Rick Allen. Joyce Sidman’s poems show us garter snakes, moose, snowflakes, bees, foxes, beavers and more. Sidman also provides explanations about each poem.
The Snowy Day, a Caldecott Medal winner, is the simple tale of a boy waking up to discover that snow has fallen during the night. Keats’s illustrations, using cut-outs, watercolors, and collage, are a great motivation for an art activity.
Make a Snowflake
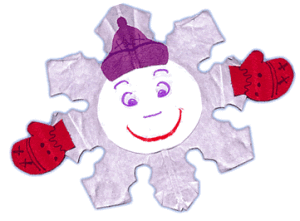
Students can make their own large snowflakes or have a parent helper cut out snowflakes using the snowflake tracer available here. A second tracer is available for the mittens and hat. A circle provides a face ready for two eyes and a smile.
Materials:
- tracers above
- 8.5 x 11 white paper
- construction paper
- glue, scissors, markers
Procedure:
- Teacher cuts out a stack of circles for the faces and snowflakes if it is too difficult
- Fold paper in half vertically
- Place tracer with straight edge on fold and draw around it
- Cut through both layers of paper, then open up
- Trace mitts and hats, glue on, draw faces
- Optional: Once the glue is dry, have students measure their snowflakes with blocks. How many blocks from mitten to mitten? Record their answers and compare.
Snowman Art – Comparing height
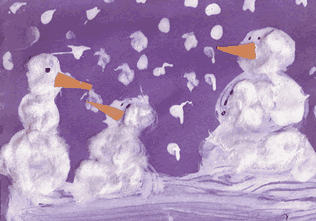
Another fun winter art activity begins with colored construction paper, white paint and glue and cotton balls.
Materials:
- blue construction paper
- white paint mixed with white glue
- cotton balls
- cut out carrot noses
Procedure:
- Children first draw the snowman circles and snow with white paint mixed with white glue.
- Encourage kids to make their snowmen 3 different heights and looking in different directions for a more interesting picture.
- Attach cotton balls to the wet paint/glue.
- Decorate with carrot noses.
- Optional: When the glue is dry, measure how many blocks tall each snowman is. Unifix blocks™ work well for this. They can write the number beside their snowmen with a white pencil crayon.
- Display the pictures and talk about how the snowman are the same and different. Some are taller, some are shorter. Many are different heights.
Language Arts Winter Vocabulary Book
Materials:
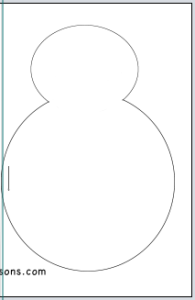
- Snowman book tracer – photocopy one for each child on 8.5 x 11″ paper
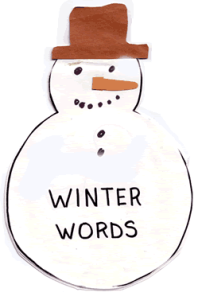
- Put 2 – 3 pieces of addition white paper inside, fold and staple side of snowman body as shown in image on right
- scissors, glue sticks
- Construction paper to make a snowman hat
- Markers to make face and print words
Procedure:
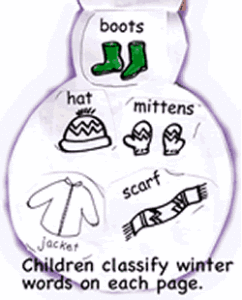
- Give each child a folded stapled book like in the image on the right
- Children cut out through all layers of paper around the snowman. Show them how to cut out on the outside of the lines or the snowmen might be pretty tiny!
- Children decorate the cover and leave to dry.
- The next day as a group, bring in actual winter clothes, food, and pictures of ice, snow. Sort into groups with the children.
- Have children cut out pictures from the free winter word worksheet 1 and winter words worksheet 2, then classify them into groups. (Cut around the pictures)
- Glue each category of winter words on individual pages, one for winter foods, one for winter clothes, another for winter weather.
Winter reading activities
Act out “The Mitten” story
- Read and compare two versions of “The Mitten” (See books here…)
- Pretend a table is the big white mitten and the children take turns being the various characters and crawling inside the mitten (under the table!).
- Another winter activity is to make a snowy white mitten to practice sequencing the story. Use this large mitten tracer to make your own lightweight card mitten or purchase a big white mitten from the store.
- After sequencing the story as a group, the children can make their own mitten. A parent is often needed to help cut the mittens out, punch the holes, and help the kids sew them together with yarn. Use firm white card so they don’t tear easily. Warning!! Preparing this activity is a big job! An alternative is to staple the mittens and then put tape over the openings so the card does not rip easily.
- The children draw pictures of the animals or you can download and print the animal pictures from www.janbrett.com, have the children cut them out and retell the story.
- Have a chart posted with pictures of all the animals and the animal words on it.
 Teacher Tip!
Some children spend way too long trying to cut out around each leg of an animal or another object. The jagged cuts get caught and tear on the sides of whatever they are trying to insert them in such as the mitten above or an envelope. Teach them to draw a circle around each item and then cut out around the circle. So much faster!!!! Shulevitz
